








Fitting a Kroozer strobe light kit comes down to four jobs: mount the two pods low on either side of the bike’s rear, route the wiring along paths your bike already has, fit the small push-button switch where your thumb can find it, and test every pattern before your first night ride. Nothing here needs a drill. The steel slide brackets are made to go under bolts your bike already carries, which is why the same kit fits motorcycles generally rather than a shortlist of approved models.
If you would rather not touch the electrical side, that is a fine choice too. Hand the box to your regular mechanic at the next service and point them at this page. For everyone else, here is the full walkthrough, written by the people who make the thing.
The kit, in three parts
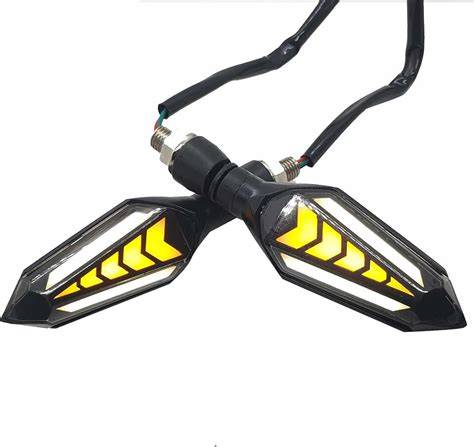
You are working with three components. The pods: a pair of small matte black units, each on its own flat steel slide bracket with a single bolt hole. The loom that powers them. And the push-button switch that turns them on and cycles through the 20+ patterns. The STROBE V7.0 Pro with Brake Mode is sold as a pair on purpose: two separate points of light spaced across the rear of the bike read as a vehicle with width, not a lone dot that could be anything.
Step 1: choose where the pods sit
The design intent is low and wide. One pod on each side of the rear number plate is the classic position. Beside the rear suspension, under the seat cowl, works just as well on bikes with a tidy tail. Angle each pod slightly outward, keep the pair roughly level with each other, and keep both clear of the exhaust and of anything that moves: the wheel, the chain, the suspension through its travel.
There is a front option too, low on the fork legs or fairing sides, and some riders run both ends. Start with the rear pair. The traffic you most need to talk to at night is the traffic behind you.
Step 2: mount the brackets
Each bracket is a flat teardrop of steel with a round hole at one end. Pick a bolt near your chosen spot, back it off a few turns, slide the bracket under the bolt head, set the pod’s angle, and torque the bolt back down. Number plate bolts, tail tidy fasteners and cowl bolts are the usual candidates. When you are done, give each pod a firm wiggle. It should hold its angle and not rotate. That is the whole mounting job, and it is also the answer to the fitment question: because the bracket borrows a fastener the bike already has, the kit does not care what model you ride.
Step 3: route and connect the wiring
Route the loom along the paths your bike’s own cables already follow: under the seat, along the frame, away from the chain, the rear wheel and the exhaust. Cable tie it at regular points so nothing hangs or flaps, and leave a little slack anywhere the suspension moves. Wiring neatness is not cosmetic. A loom that cannot snag is a loom that keeps working.
The connections depend a little on your bike, and this is the one step where there is no shame in stopping. If reading a bike’s wiring is not your idea of a good Saturday, let a mechanic make the connections and do the rest yourself. Take particular care over the brake connection, because Brake Mode is the headline feature: wired in, the pods respond the moment you press the brakes, which is exactly the moment you most want the person behind you paying attention. We covered what the kit asks of your bike’s electrics separately, in plain terms: do strobe lights drain your bike’s battery?
Step 4: fit the switch
Mount the small push-button switch where your thumb naturally falls. Near the left switchgear is popular. Press once and the pods come alive. Keep pressing and you cycle through the patterns: double flash, both together, alternating left and right, and the rest of the set. Pick the pattern you want before you set off and leave it alone on the move. Choosing a mode is a parked-bike job, like adjusting your mirrors.
Step 5: test before you ride
Four checks before the first night out. Both pods fire. Every pattern cycles cleanly. The brake response works with the engine running. And nothing rubs or pulls when the bars go lock to lock and the suspension compresses. Then step back behind the bike at dusk and look at it the way following traffic will. What you want to see is two distinct red points, one on each side of the plate, unmistakably a bike.
A word on using them considerately
Rules on auxiliary lighting vary from state to state and with how a light is used. Kroozer strobes are auxiliary visibility lights. The point is to be seen, not to dazzle, so pick a pattern that reads clearly without being harsh and keep the pods aimed low and outward, not up into mirrors. If you want the longer answer on where the law stands, we wrote one: are blinking lights legal in India?
Quick answers
Will it fit my bike?
Yes. Kroozer strobe lights fit all motorcycles. Fitment comes from the mounting method, a bracket under an existing bolt, not from a compatibility list. A Royal Enfield Classic 350 and a modern commuter mount it the same way.
Can I install it myself, or should a mechanic do it?
The mounting is a home job: one bolt per side. The wiring is where people split. If you have run accessory wiring before, this will feel familiar. If not, any bike mechanic or accessories fitter can make the connections, and a routine service visit is a natural time to have it done.
I ride a Royal Enfield. Anything specific to know?
We wrote a dedicated walkthrough for that: how to fit strobe lights to a Royal Enfield. The process above still applies; that guide walks an Enfield’s tail area in detail.
Which pattern should I ride with once it is installed?
One that reads clearly without straining the eyes of the people behind you. We went deep on that question here: who should avoid strobe lights, and which pattern to ride with.
What does the kit cost?
The STROBE V7.0 Pro with Brake Mode is Rs 1,399 for the pair, with a one year warranty. Full details are on the product page. And if you are still weighing options across the market, our honest comparison is here: which bike strobe light is best?
Fit it once, test it properly, and it becomes part of the bike. Press the button as the light drops, and ride knowing the traffic behind you never has to guess. Be visible. Be home.


